This morning I decided to have a bowl of oatmeal and every once in a while I enjoy my oatmeal with some Sorghum or Molasses. I chose sorghum this morning and as I was quietly eating it I began to wonder what the health benefits to sorghum were. I always heard that Molasses was good for a boost in iron but I admitted to myself that I really did not know much about sorghum so I decided to do a little research.
First of all... What is Sorghum?
Sorghum is made from 100 percent pure, natural juice extracted from sorghum cane. The juice is cleansed of impurities and concentrated by evaporation in open pans into a clear, amber colored, mild flavored syrup. The syrup retains all of its natural sugars and other nutrients. It is 100 percent natural and contains no chemical additives of any kind.
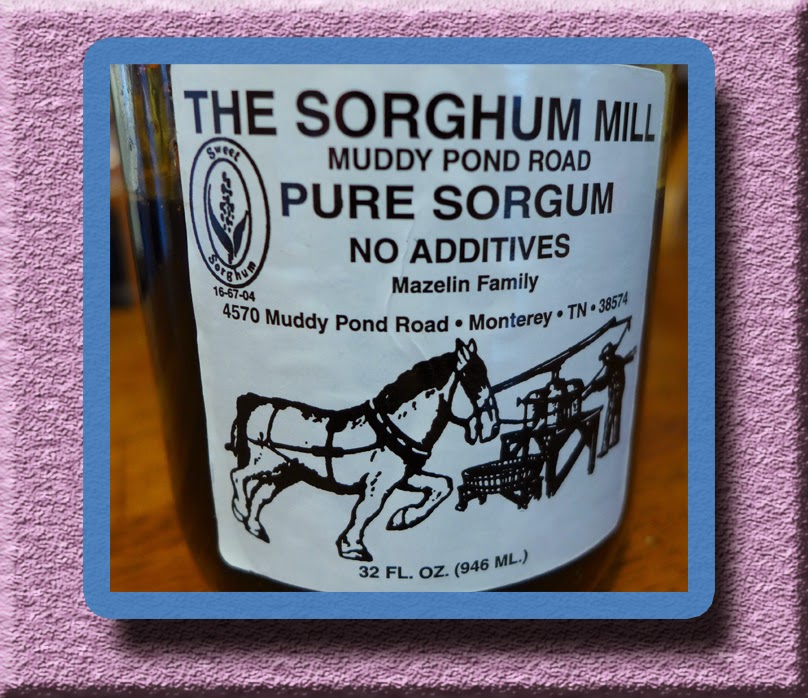
Here is a video that explains how sorghum syrup is made. This is the place that actually made the sorghum that I had on my oatmeal this morning. I thought it was totally awesome to watch how they made my breakfast sweetener. It is so neat that it was made by a family that has been doing this for so long. Yes, they really do use horses to mill the cane. :)
What is the Difference Between Sorghum and Molasses?
Molasses is a by-product of the sugar industry, whereas sorghum is the syrup produced when the extracted juice from the sorghum is boiled down. Sorghum is milder in taste.
What Does Sorghum Look Like?
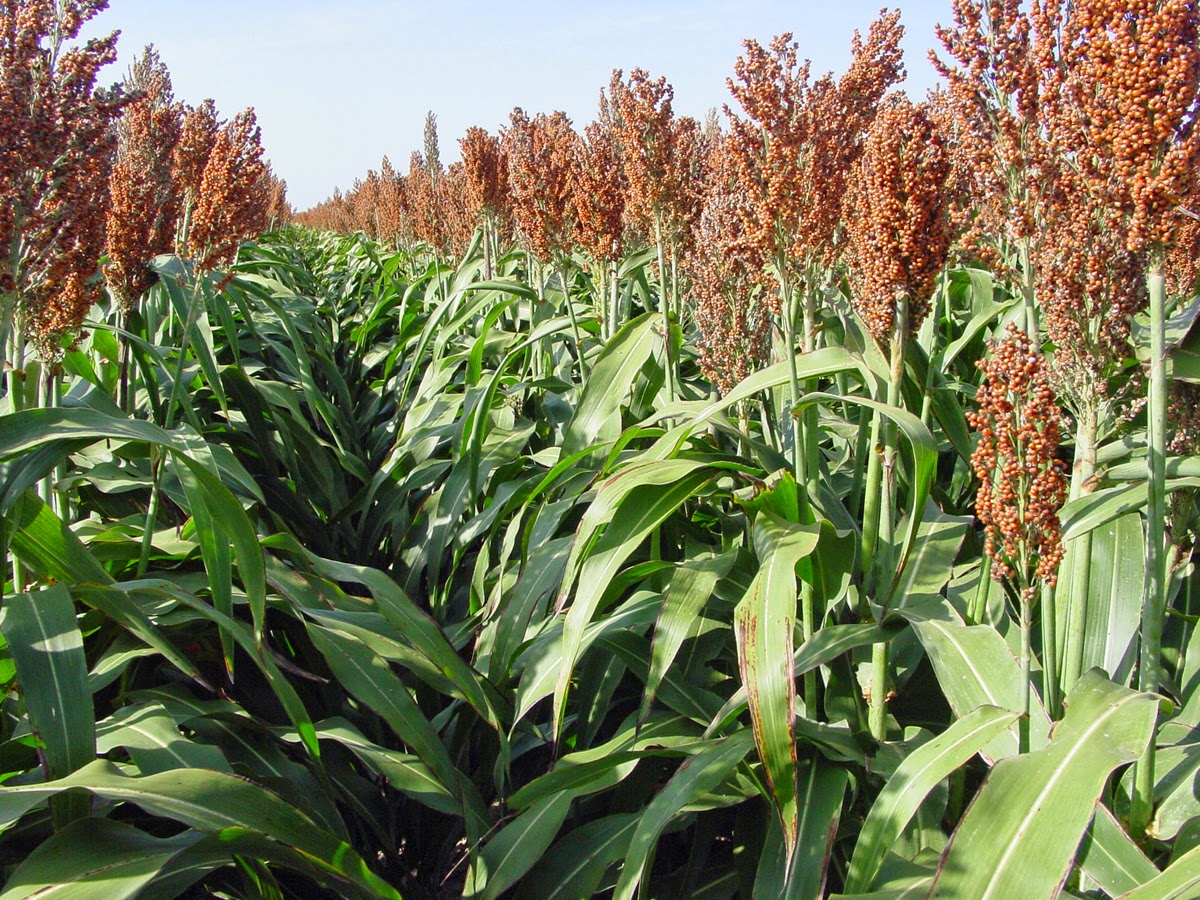
Sorghum kind of resembles corn stalks when it is growing in the field.
What Else Does the Sorghum Plant Produce?
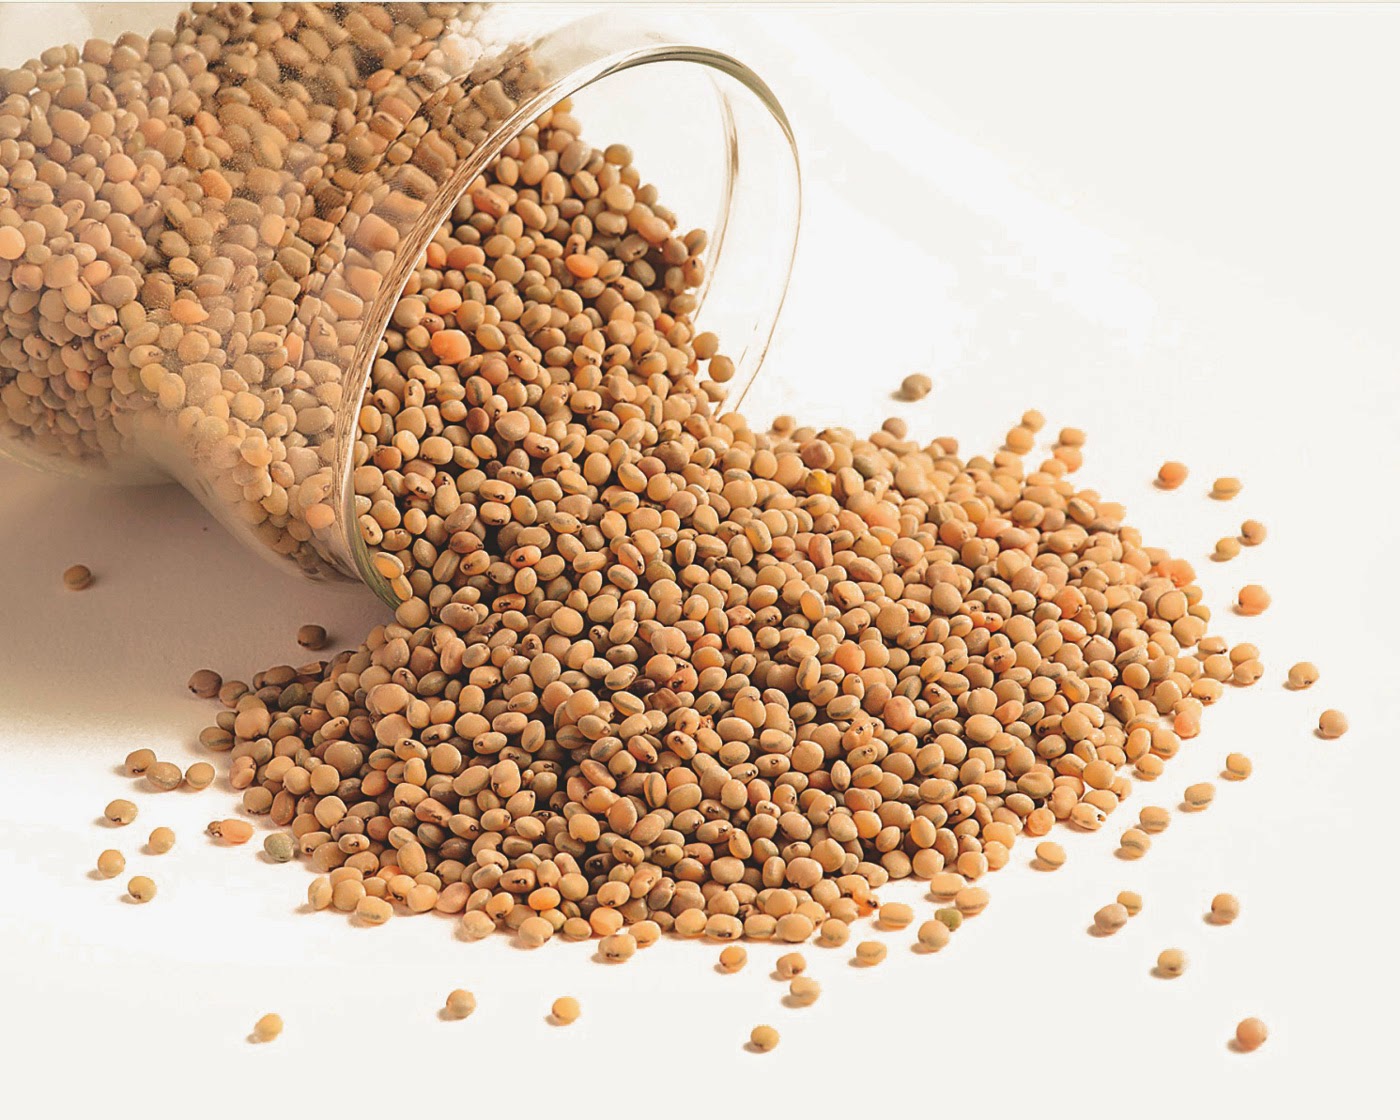
Not only will sorghum make a delicious syrup, but you can eat the sorghum seeds. It is gluten-free and there are so many things that you can do with it. Here is what the seeds look like.
Here is a link to the nutrition facts of Sorghum grain:
Sorghum is a cereal grain that originated in Africa about 5000 year ago where it continues to be an important food source today. It is sometimes called milo and in India it is known as jowar.
Today the United States is the largest producer of sorghum where it is primarily used for animal feed. Because of the growing need for gluten-free products sorghum has become a popular ingredient in gluten-free flour and baking mixes.
Sorghum grain is like corn because it is an incomplete source of protein. It does not supply adequate amounts of lysine, an important essential amino acid (protein). The body requires lysine for growth, bone health and for converting fats to energy.
A large verity of gluten-free flour mixes contain sorghum flour blends with other GF flours, starches and leavening agents. It is blended because using sorghum grain alone produces dry, gritty baked goods. If you mix it with tapioca starch than your baked goods have a better volume and texture.
Look at what else you can do with the Sorghum grain/seeds.
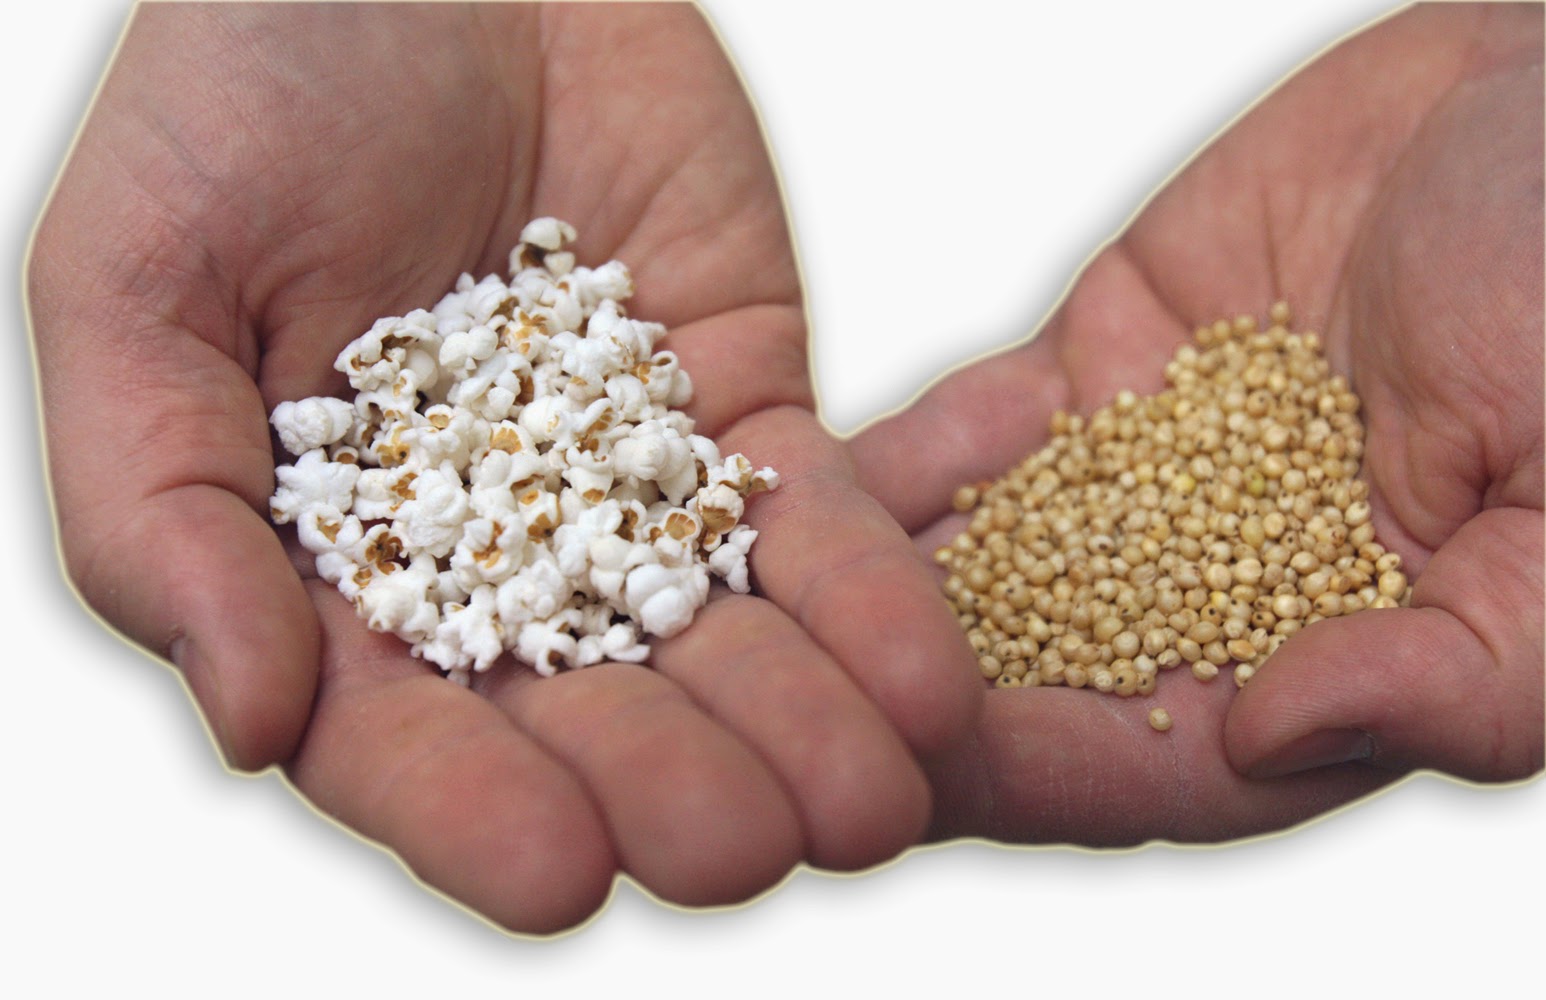
YES!! That is popped sorghum seeds!! Haha! I was so excited when I found this out. It looks so YUMMY!!
Lets learn more about popping sorghum seeds.
They are very small but they have a HUGE flavor.
It is a super healthy whole grain food (containing calcium, magnesium, potassium and iron) low in calories and fat, and gluten free!
Because it essentially has no hull, popped sorghum grain may also be tolerated and enjoyed by some sufferers of Crohn's disease and diverticulitis. Of course, you should always consult your doctor if you have these conditions before changing your diet.
It does have a lower yield than popcorn (meaning that up to 30-40% of the grains may not pop) but that is part of its charm. Many of the grains that don't pop are toasted in the process, making them crunchy, nutty and delicious!
Here is a video that shows how to pop sorghum seeds:
Lets get back to our discussion on sorghum syrup. :)
What is the Nutritional Value of Sorghum Syrup?
One tablespoon of sorghum syrup supplies all of the average adult’s daily potassium needs. It’s also high in antioxidants.
One tablespoon of sorghum syrup:
- 30 mg calcium (3% DV)
- 300 mg protein
- .76 mg iron (almost as high as blackstrap molasses; 4% DV)
- 20 mg magnesium (5% DV)
- 11 mg phosphorus
- 200 mg potassium (almost 6% DV)
- .80 mg zinc (5% DV)
- .03 mg riboflavin (a B vitamin; almost 2% DV)
Before the invention of the daily vitamins, many doctors prescribed sorghum as a daily supplement for those low in these nutrients.
How Can You Be Sure That You Are Buying Pure Sorghum?
IMPORTANT!!
The logo seen here was developed by the NSSPPA as a tool to insure that you are buying a pure sorghum product. Each producer in the association is given a number to put on their logo that will quickly identify where and by whom the sorghum was produced. When you see the logo, you will know that you are getting pure sorghum, NOT the blend. MAKE SURE YOU LOOK FOR THE LOGO.

I was relieved to see that my jar of sorghum had the logo on it. Whew!! :)

What To Do If Your Sorghum Crystallizes?
Like honey crystallizes, sorghum does too. Yes, mine is starting to crystallize. :) Putting your sorghum in a pan of warm water can restore it to a usable form. I also run warm water on the lid if I have a hard time opening it. I do not have a microwave but if you have one, you can put it in the microwave for a few seconds to loosen the crystals.
Is Sorghum a Good Sugar Substitute for Diabetics?
No. Although it is a natural product, it is still a sugar and will effect your blood sugar readings. Talk to your doctor to see if small amounts of sorghum can be incorporated into your diet.
I am truly happy that I decided to research all the beautiful qualities about sorghum. I am excited to give sorghum seeds a good popping. LOL I think they will be something that I would enjoy very much. :) Maybe you will want to give sorghum a try too.
THANK YOU so much for visiting our blog.
Subscribe to our Youtube channel and join us on our facebook page. We would love to have you join us.
Have a beautiful day!!
EASYMEWORLD YOUTUBE CHANNEL:
https://www.youtube.com/user/EasyMeWorld
EASYMEWORLD FACEBOOK:
https://www.facebook.com/EasyMeWorld
https://www.youtube.com/user/EasyMeWorld
EASYMEWORLD FACEBOOK:
https://www.facebook.com/EasyMeWorld