Tuesday, December 17, 2013

4 Nifty New Years Tips

I want to share with you 4 easy tips that will help you start your new year off right.

VIDEO LINK:  
You can watch our video to get full details on each of the tips. 

Here is a list of the tips:

TIP #1
The first tip is a money saving tip to help put you in a money saving frame of mind. By thinking about how you can save money in small ways, you are making yourself aware of how the little things add up. This is the perfect way to start this new year because by saving money on things that you do NOT need, you are putting money in your pocket for things you DO need. Let's start by saving money on our yearly calendars. 
I used to spend over $30 on new calendars every year. I found a way to pocket that money and still have beautiful, decorative calendars in my home. 

 TIP #2 
For the second tip I will tell you how I like to keep myself motivated to keep exercising. So many times we make our New Years resolutions and we wind up breaking the promise of keeping up with our workouts. By making our workouts fun and non-repetitive, we can change the way we think about keeping fit. You CAN look forward to your workouts instead of cringing at the thought. :) 

Tip #3
For the third tip I will share with you one of my favorite health and fitness websites. This website is FREE to use and they have so many great tools to encourage you along your path to better health. You can keep track of your diet, calories, protein, workouts and more from this site. The list of healthy recipes on their site is endless. You can even share your own recipes. They also have videos that offer free workout routines to encourage you to stay motivated. They have an app for your mobile devices to make it easy to use no matter where you are. They also offer lots of articles to uplift and keep us on track toward a healthier lifestyle. If you are interested in a community that is filled with people to encourage you... they have it. There are many like-minded people who interact with each other on this website. They have knitting groups, positively uplifting groups, reading groups... you name it. It is a great place to find the support you need to help you stay motivated to keep a healthy mind and body.
Check out the site: 

Tip #4
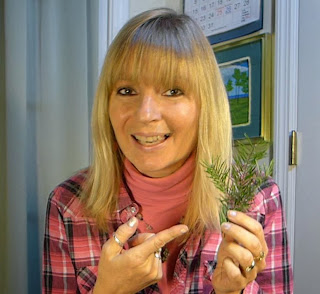
The last tip is to show you what you can do with your Christmas tree trimmings. Before you throw away your Christmas tree, cut off some of the branches and put them in a box or bag. They smell wonderful when you cut them into small pieces and simmer them in water. It is a great way to put your tree to good use. It makes your house smell so good. There will be plenty of branches to be able to change your pine potpourri every day. :) Give it a try. 

I hope these tips help and encourage you to get your New Year started off right. Thank you so much for stopping by our blog. Don't forget to check out the video and subscribe so you don't miss anything. 
Have a beautiful New Year! 


EASYMEWORLD YOUTUBE CHANNEL:  https://www.youtube.com/user/EasyMeWorld

EASYMEWORLD FACEBOOK:  
https://www.facebook.com/EasyMeWorld

Tuesday, December 10, 2013

How To Make Easy Christmas Cookies

These cookies are one of my favorite cookies to make for Christmas. I used to make them all the time to give as gifts. They were a big hit with everyone. I started out making the chocolate-mint cookies which reminded me so much of the mint cookies that I use to buy from the Girl Scouts. Then I decided to try adding peanut butter instead of mint and WOW!! The peanut butter-chocolate cookies are amazing too. These cookies are so easy to make and they do not take many ingredients at all. You do not even have to bake them!! 

I made a video that shows you how I made my cookies and it also gives you lots of tips and tricks too. So don't miss the video tutorial. 
Here is the link:

Here is how I make the cookies...

Mint-Chocolate Cookies 
*1 - 20 oz. Package of candy bark or 1 - 11.5 oz. package of chocolate chips
*1/4 tsp. peppermint extract
*2 tube packs of RITZ Crackers
*Candy canes, crushed 
or decorating sprinkle sugar

Peanut Butter- Chocolate Cookies 
*1 - 20 oz. Package of candy bark or 1 - 11.5 oz. package of chocolate chips
*1 tablespoon of peanut butter
*2 tube packs of RITZ Crackers
*Candy canes, crushed 
or decorating sprinkle sugar

You will need a double boiler to melt your chocolate on the stove. I do not have a double boiler but I show you what I used in the video. It is always fun to use your imagination to substitute with things you DO have. :)

Do not be afraid to use the store name brand of crackers. I know the recipe calls for RITZ crackers but you will never know the difference. 

I use waxed paper to cover a cookie sheet.

I break up my chocolate bark or pour my chocolate chips into my double boiler to melt the chocolate. If you need more tips on how to melt chocolate, here is a link that explains how to do it over the stove or in the microwave:  

After your chocolate is melted you can add your peppermint extract or your peanut butter. I use a scraper to keep the chocolate stirred. I also leave my burner on low after the chocolate is melted in order to keep the water warm. This will keep the chocolate melted as you dip your crackers. 

I use tongs to dip my crackers into my chocolate. I flip it over on both sides to make sure that the cracker is covered. Then I use my scraper to get the extra chocolate off of the bottom of the cookie. This will use less chocolate and allow you to make more cookies. Both sides are still coated but there is less chocolate on the bottom. This also helps prevent the chocolate from puddling under your cookie and deforming it. 

After the cookie is dipped, I place it on the cookie sheet with the waxed paper. You can use crushed candy canes or sugar sprinkles to decorate your cookies. I like using sugar sprinkles.

After my cookie sheet is filled with cookies, I slide off the waxed paper with the cookies on it onto the table to allow the cookies to cool. 

When the cookies are done cooling than I just pick the cookies off of the waxed paper and put them in my Christmas containers. 

The batch that I made with the candy bark made about 73 cookies. The chocolate chip batch made about 54 cookies.

TIP:  The chocolate chip cookie batch needed to be refrigerated. I actually refrigerated the cookies a little in order to get them off of the waxed paper to put in the container.

Wasn't that easy??? They will be a BIG HIT with family and friends. I promise. :)

Thank you so much for visiting our blog. 
Don't forget to check out our YouTube channel and subscribe so you don't miss future ideas. 

We also have a facebook page. We love to share our ideas with each other. I also keep you updated on things that I do not put in videos or on our blog page. 

HAVE A MERRY CHRISTMAS!


Wednesday, December 4, 2013

Make A Christmas Ornament For Your Pet

I love this project!! It is super fun to do with your kids and it is a great way to remember your pets each year when you decorate your Christmas tree. We used polymer clay to make these ornaments. It is such fun to work with polymer clay. You can make this project out of salt dough too but I wanted to try it with polymer clay because I thought it would last longer. :) 

These make GREAT gifts! I made most of mine to give as gifts. It is such a thoughtful way to surprise your friends and family who have special pets that share their lives. You may have to get creative with how you will get your Mom's dog to give you a foot print if you want to surprise her. hehe 

You can make paw print ornaments for your cats and dogs. 


I also came up with a way to always remember your favorite pet horse. You take the horses hair out of their brush and wrap it around your fingers to make a wreath. Then you add a bow to it and glue it on your clay ornament. 

I love how this one turned out!!

I know that many of us love our little pet birds so I came up with this little idea. I took a saved feather and made an ornament for my girlfriends little bird. I know she will adore this little gift.  

Use your imagination to make your ornaments the way you like them and make them as colorful as you like. 

I added glitter to this one. 

If you would like to see the step-by-step tutorial on how to make these adorable Christmas Ornaments you can watch the video by clicking this link. 
You will also meet my pets who so sweetly let us record the process so we could share it with you. :)


Thank you so much for visiting our blog. Don't forget to subscribe to our YouTube Channel so you do not miss any of our future ideas. 
https://www.youtube.com/user/EasyMeWorld
 We also have a Facebook page where we love to share our creations with each other. 
https://www.facebook.com/EasyMeWorld
Have a very Merry Christmas!!

Wednesday, November 20, 2013

DIY Owl Decorations - A Gift Idea


I wanted to make up a craft that was easy and inexpensive so I came up with this little sweetie. I am making them for Christmas gifts but you can make them for Christmas ornaments too. You can make them any shape or size that you want. I made 2 different shapes while I was experimenting and they both turned out great. I loved the fact that these did not cost me anything at all to make. I had all the materials that I needed right at my finger tips. Pine cones and twigs are FREE. hehe Your friends and family will adore these original decorations!! 

You will need:
Pruning shears
Pine cones
Scissors
Hot glue gun
Foam or colored paper
Cardboard
Twigs
Twine

I started to put together a blog post on how to do this project but realized that there were a lot of steps and pictures to explain. So I decided to give you a link to the video so you can watch the tutorial step-by-step as I do it instead of posting all the pictures. I am not sure I would do this project justice by doing that. 

 The video is very explanatory and it shows you in a clear way to do each step. 
Here is the link:  http://youtu.be/33gBXgCoJr0
Don't forget to subscribe if you would like to see more tutorials like this.  
Thank you so much for visiting and I hope you enjoy creating your own owls. :) 


HERE IS ANOTHER EASY OWL CHRISTMAS ORNAMENT:

Easy Owl Christmas Ornaments


They are so cute and you can make a bunch of them at one time!! They will make the perfect gifts for teachers, friends and family.


EASYMEWORLD FACEBOOK:  https://www.facebook.com/EasyMeWorld


EASYMEWORLD YOUTUBE CHANNEL:  https://www.youtube.com/user/EasyMeWorld

Tuesday, November 12, 2013

How To Make Melted Christmas Ornaments


MELTED CHRISTMAS ORNAMENTS
This is an incredibly fun ornament to make. They are made out of plastic cups. One of the fun parts about making them is that it is always a surprise to see how they turn out. They all turn out different. An absolutely crazy fun ornament to make. Once we figured out the best way to put the holes in the ornaments, the ornaments were super easy. This took trial and error but we will tell you the best way to do it so you don't make the same mistakes we made. :)  

Do not miss our "HOW TO" video that we made. We show you step by step how to make them and we also show you the details of different ways to put the holes in the ornaments.
I am sure you will get a good laugh at how silly we are too. LOL

~~~~~~~~~~~~~~~~~~~
HERE IS WHAT YOU WILL NEED:

*Clear Plastic Solo Cups
(Do not get the cheap cups. They do not work well)
*Markers
*Yarn or Fishing line
*Scissors
*Hole Punch
*Oven and Baking sheet w/foil
~~~~~~~~~~~~~~~~~

The first thing we do is color our cups with markers. Use your imagination to create cool designs. 
Here are a couple of our cup designs...

We set the oven on BROIL.

We discovered that the best way for kids to make the holes in their ornaments is to put the holes in the cups BEFORE you bake them. Make a few holes around the outside of the cup to be sure that at least one of the holes does not melt closed. During our experiment we punched 2 holes. One hole closed up but the other did not. It is also MUCH EASIER to punch the holes in the unbaked plastic. The plastic becomes brittle after it is baked and it was easy to break while punching the holes. Kymberly used a knife to put holes in the ornaments that were already baked but we do not recommend or encourage kids to use knives. 


After our cups are colored, we put foil on our baking sheet and then set the cups on top of the foil. Then we bake them for 20 seconds. That's right... 20 SECONDS
When we pull the ornaments out of the oven they are flat and wavy. They turn out AWESOME! The kids will have so much fun seeing how the ornaments change in just 20 seconds.
We take them off of the cookie sheet and let them cool on the counter.

Most of the clear areas turn white. It is a neat transition!!
After they are done cooling... they cool pretty quick... you can tie your string on.

This is MUST TRY for the Holiday season. The kids faces will light up when they see how quickly their artwork turns into something so different after a few seconds in the oven.

As always, thank you so much for stopping by.
MERRY CHRISTMAS!!

Here is the video link:

We always have new creative crafts in the works so don't forget to subscribe to our Facebook page: https://www.facebook.com/EasyMeWorld

And our YouTube Channel:

You can also check out Kymberly's channel:

Tuesday, November 5, 2013

DIY Snowman Christmas Ornaments


These darling Christmas ornaments are such fun to make and they would make AWESOME Christmas gifts for teachers and friends. They are made out of recycled bottle caps. These snowmen will be a great addition to any tree. They are also a great treat to add to the Holiday fun of making your own Christmas ornaments. 

You can see us make these cool snowmen by watching our "How To" video. 

~~~~~~~~~~~~~~~~~

Here is what you will need:

Bottle Caps
White Spray Paint
Orange and Black Markers
Black Felt
Small Twigs
Thin Black Ribbon
Glue Gun
Yarn
~~~~~~~~~~~~~~~~

The first thing that I do is make a scarf by crocheting with a chain stitch. I make it about 5 1/2 inches long. If you do not have a crochet hook, I show you in the video how you can do this with only your fingers. :)


I put all of my bottle caps onto an old feed bag and then spray painted them with white spray paint. I gave them a generous coat. After they dried, I flipped them over and sprayed the other side. I gave them 2 coats of paint but you may be able to get away with 1 coat.

The next thing I do is lay 3 bottle caps down on the table in a row. I cut my ribbon to about 6 1/2 inches long. Then I get my hot glue gun and put a line of glue down the center of each of the caps. I place the ribbon on top of the glue and then make a loop at the top of my snowman. I put another dot of glue to hold the loop in place. This will give you a way to hang your snowman on the tree. 

The next thing I do is put a dot of glue between each of the bottle caps and glue the bottle caps together. This will make your snowman one piece and it wont flop around.

I lay my snowman down and I draw the eyes mouth and buttons on the snowman with black. Then I draw an orange carrot nose. I also get the snowman's scarf and glue it around his neck. I put my scarf off to the side so it does not cover up the cute buttons. :)

I cut out a top hat with my black felt. You can make your top hat any color you want but I liked the black the best. Then I put a line of glue on the top hat and glue it to the snowman's head.

The last thing that we do is to glue the arms onto the snowman. I use small twigs that I cut off of a tree in my yard. I laid the snowman down and glued the twig onto the middle bottle cap across the back of the snowman.
I was asked on our YouTube video comments if we can do this same thing with plastic lids so I decided to give it a try. I made these two little sweeties (down below) out of gallon jug lids. I used fine sand paper to lightly scratch up the front of the lids to be sure that the paint stuck to the plastic. It did a great job. The glue may pull off the paint if you make a mistake so be careful to go light on the glue when you are using it to glue the lids together or putting the scarf on. Here is a picture of how mine turned out. :)
We hope you enjoy making these adorable snowmen as much as we did. Thanks for stopping by!
Merry Christmas!! 

EASYMEWORLD YOUTUBE CHANNEL:  

Don't forget to watch our "How To" video.