Sunday, June 15, 2014

Easy Barefoot Sandals

One of the really awesome things about summer is the joys of walking around barefoot. When my daughter asked me to make her a pair of barefoot sandals for her birthday I knew that I would have to come up with something easy. After I figured out an easy pattern and tried them on, I was AMAZED at how much fun they were to make and how pretty they made me feel when I put them on. That is when I decided to make sandals for each of my girls, a couple of friends and a pair for myself. They make GREAT gifts. There is nothing better than to share the opportunity to feel pretty. hehe I also wanted to share with you how easy they are to make so you can experience their beauty also. That is why I made a step by step video on how to make these delightful sandals. 

This video is very easy to follow and I hope it encourages you to give this awesome project a try. 


The only things that you will need for this project are:
*Scissors
*String (I used colorful crochet string)
*Beading Cord or Hemp
*Beads
*Clamp

Here are pictures of the sandals that I made.

I mostly used glass beads but I did use some gemstones and seashells on some of them.


Use your imagination to make each pair of sandals unique. 


 Use different patterns in your beads to create original designs.


Use different colors of string to add that special touch to each sandal. I was sure to make my girls sandals in their favorite colors. That way I knew that it would make them each feel special every time they wear their sandals.


They are very comfortable to wear with flip flops. This allows you to slip something on your feet easily if you need to. 

Don't miss out on how to make these beautiful sandals. Check out the YouTube video.
Easy Barefoot Sandals

-------------

We hope this tutorial will inspire you to give this really cool craft a try. Please take time to visit our YouTube channel. Thank you so much for visiting our blog. :) 

Subscribe to our Youtube channel and join us on our facebook page. We would love to have you join us.
Have a beautiful day!! 

Thursday, May 1, 2014

Lots of Ideas for Polymorph, a Moldable Plastic - ThermoMorph Review

I was contacted by a company named ThermoMorph and they asked me if I wanted to try their product and make a video review of what I thought. In return they gave me a free jar of  ThermoMorph. It is a moldable plastic. I was AMAZED at the things that I could make with this stuff. I made Barbie accessories, jewelry, a custom crochet hook, a loom hook, slingshot pellets, a guitar pick, drawer handles, Christmas lights, shoelace ends and so much  more. The possibilities are endless. This is a crafter's dream come true. hehe 

In this blog post I want to share with you some pictures of the things that I made. I also encourage you to check out the video that I made. It will give you all kinds of tips and tricks. I will tell you what I think of the product and how well it worked for me. I will also show you some of the techniques that I used to make the things that I created.
Here is the link to my video:

First of all what is moldable plastic? 
You put these plastic beads into water and they melt enough for you to form into whatever you feel like making. 
Here is what the beads look like when they are cool. (above)
When they are heated in water, they turn clear and become very moldable. 

Here are some of the things that I made
I made all kinds of jewelry. I wanted to come up with ideas that were different. I used items that were sitting around my house to mold my jewelry into different forms. In the video I show you some of my techniques. It is a lot of fun to be creative while making the jewelry.
 These are my husbands favorite earrings that I made. He likes the cool colors. They are fun to wear. :)
I used puffy paint to give these earrings a texture.
Here are some hoop earrings that I made.
Here is a set of really fun jewelry. I made sunset earrings and a pendant with palm trees. I really like how these turned out.
You can make all kinds of Barbie accessories. I made a surfboard. You can make furniture, shoes, hats, dishes and MORE with this product. Fun stuff!!
I made my own custom crochet hook to fit to the shape of my hand and how I hold my crochet hook while I am crocheting. The great thing about it is, if you mess up, you can throw it back into the hot water and start again. No waste... No mistakes!!
I made my own Christmas light bulb. A Christmas tree! It looks so AWESOME with the light shining through it. The possibilities are endless. You can use any LED strand of lights to make into a custom light strand. You can make Easter lights, Christmas lights, Flower lights, Halloween lights, Summer lights, Snowflake lights... etc. I show you how easy it was for me to make this light in the video. I would love to experiment with this a lot more in future videos. 
I made my own drawer knob. My hutch was missing one. It worked great and it was so easy to thread the screw into the plastic. 
I made slingshot pellets for my slingshot. They are much more accurate than rocks and they are white so it makes it easy to find the pellets in the grass so I can reuse them. 
I made the plastic end on my shoestring so that my shoestring wouldn't fray. :)
My husband made a custom guitar pick. hehe 

There is so much that you can do with moldable plastic. I know that I will come up with many more ideas. Visit us on our Facebook page to keep updated on any new ideas that I come up with. If you have any ideas that you would like me to try, I would love to hear from you. If I give it a try, I will post it on the Facebook page... Or I may make a video on your idea. :) 
WATCH THE VIDEO ABOUT MOLDABLE PLASTIC:

WHERE TO GET THERMOMORPH:  

We hope this tutorial will inspire you to give this really cool craft a try. Please take time to visit our YouTube channel. Thank you so much for visiting our blog. :) 


Subscribe to our Youtube channel and join us on our facebook page. We would love to have you join us.
Have a beautiful day!! 


 Check out this ThermoMorph link where you can get some too:  http://www.amazon.com/gp/product/B00D3LAZ9O

How To Make An Easy Friendship Bracelet

Here is an easy way to make a friendship bracelet to look like it has beads but it really doesn't. I used knots to create the look of having beads. It is a more cost effective way to make cool looking friendship bracelets. 

Here is what you will need:
*Peaches and Cream cotton string
*Crochet thread
*Measuring tape
*Scissors
*Clip board or clamp
*Craft glue

Here is a video that will show you step by step how to do this. 


Lets get started...
I measured my center string, Peaches and Cream (white), to about 42 inches. You can experiment with the sizes of your string. This is about the size I usually use though. It turns out to be long but it is better to be too long than to come up short. I measured my crochet string (red) to be 4 times as long as my white center string. I cut the loop on the end where I started measuring the crochet string. This will give me 2 long red strings and one shorter white string. (You can use any colors you like, it just makes it easier to explain here to say the colors.. hehe)

We will start by making our clasp. 
I fold my red strings in half and put my white string at the center of the red strings where it is folded like the picture above. I will then tie the white string to the center of the red strings with a simple knot. Then I put the knot under the clamp. I put 2 red strings and the white string toward the front of the clamp like this...
I put the other two red strings toward the back of the clamp.
Now I braid it until it is the size of a small loop. That will be my clasp. 
I tie a knot at the bottom of the loop. This will tie all the strings together. (Where I am pointing my finger in the picture above) 
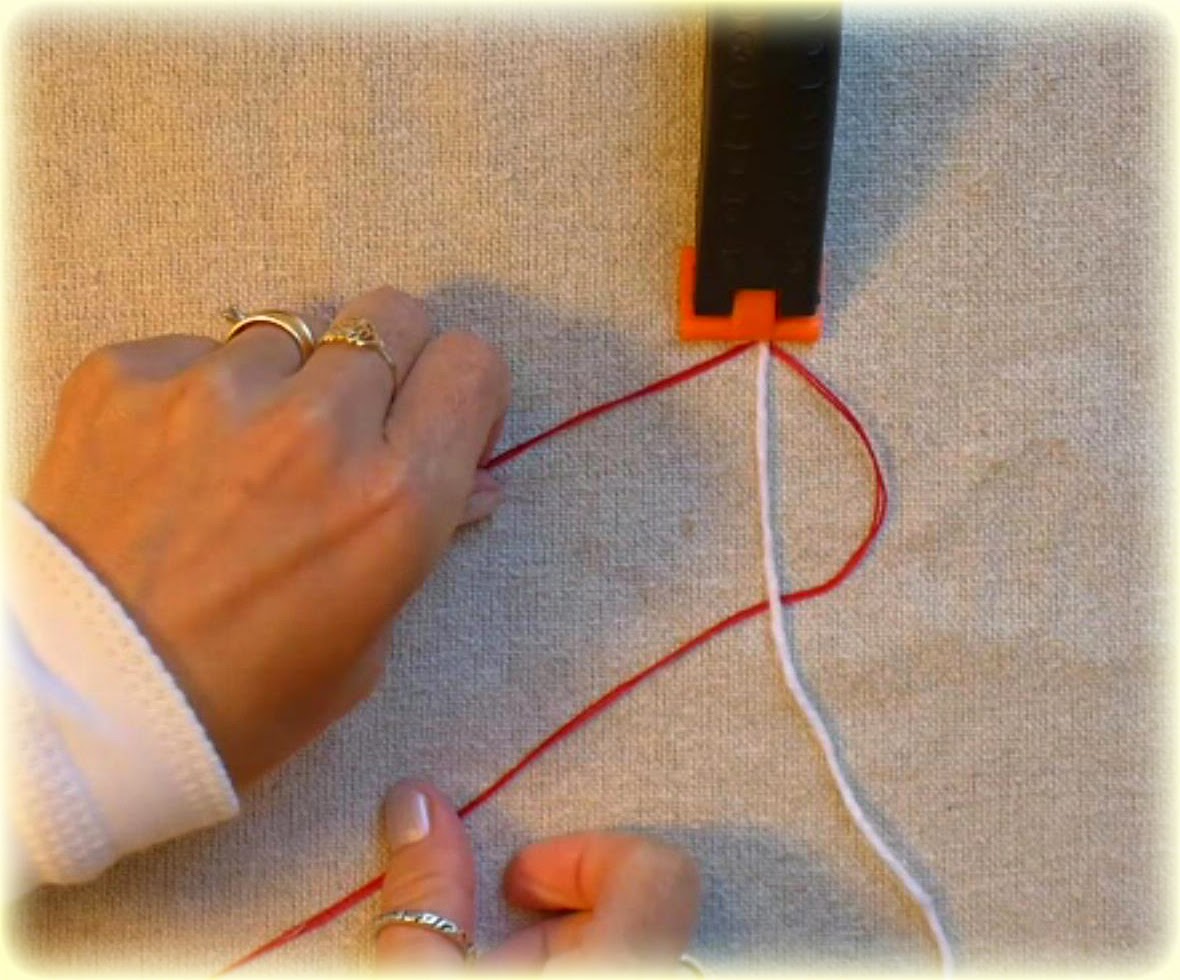
After I tie the knot, I put the clasp under the clamp and put two red strings on the right, the white string in the center, and two red strings on the left. (as shown in the picture above)
Now I take my right red string and bring it under the center white string and leave a loop on the right side. (above picture)
I take my left red string and put it under my right red string. (above picture)
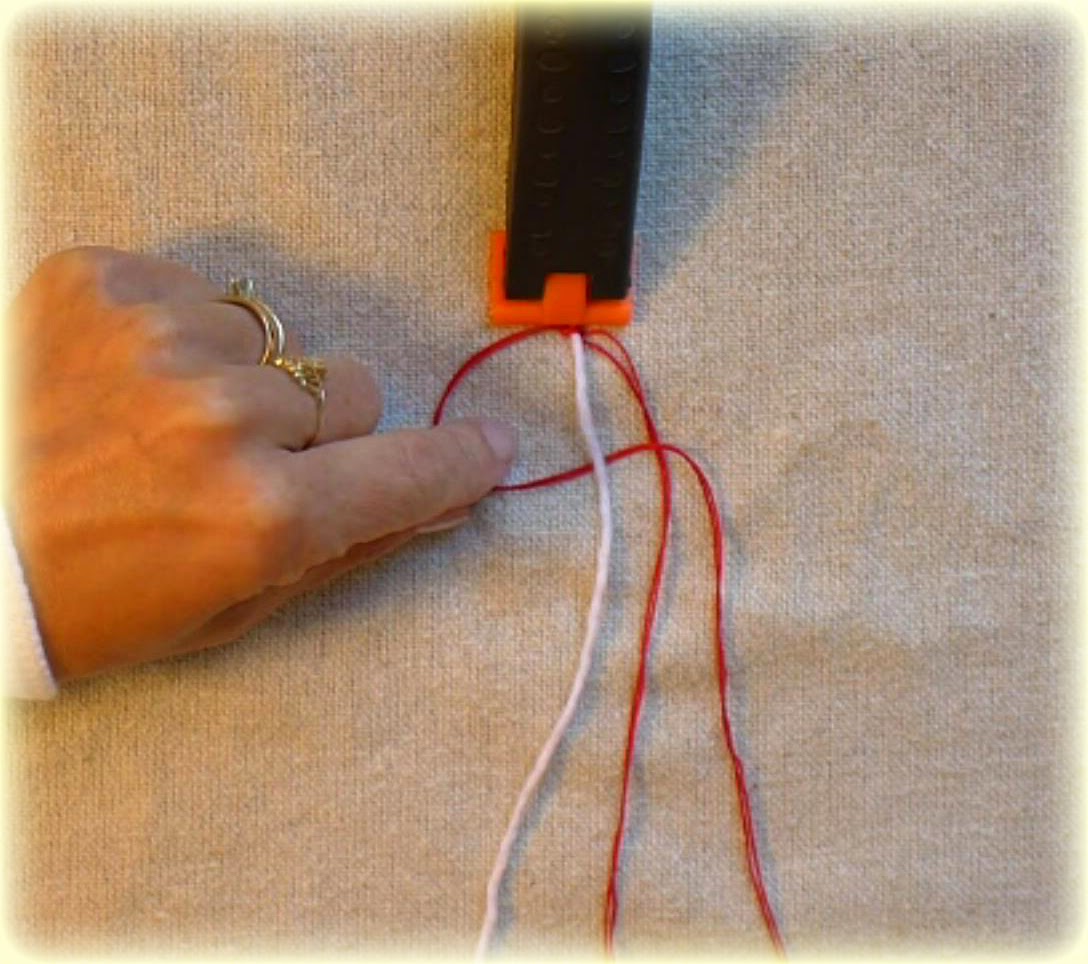
After putting the left string under the right, I bring the left string over the center white string and put pull it through the loop on the right. Put left string where my finger is pointing. (above picture) 
Now I pull the strings to make my first knot. 

Lets do the same exact steps for the left side.
I bring my left red string under my center white string and bring my right red string under the left red string and put the right string into the loop on the left. (above)
Then I pull the knot tight. That is knot number two.
Now I do knot number 3 by staring on the right.
And knot number 4 by starting on the left.
Now I tie 2 simple knots up at the top of the white string. Tie the second knot on top of the first knot. This is what will give it the look of a white bead. :)
I continue these knots all the way down until I am sure that it fits around my wrist. 4 macrame knots (red string) and then 2 simple knots (white string).  
I wrap it around my wrist to be sure.
When I know that it will fit, I tie knots in the end of my bracelet until I know that it will fit nicely into the clasp. Then I will cut the extra strings off of the end.
I use my craft glue to be sure that my knots won't come untied. 
The last thing that I do is set my bracelet in the sun to dry. 
For more pointers and tips... check out the video: 

We hope this tutorial will inspire you to give this really cool craft a try. Please take time to visit our YouTube channel. Thank you so much for visiting our blog. :) 

Subscribe to our Youtube channel and join us on our facebook page. We would love to have you join us.
Have a beautiful day!! 


Monday, April 14, 2014

DIY Solar Light Jars - Beach Theme


Here is a great craft for the whole family. Solar light jars. They will make great conversation pieces. This is a great way to reuse those old jars instead of throwing them away. I love to recycle and that is why I wanted to come up with this idea. They turned out much better than I expected and my husband loved the idea so much that he wanted to help me make them. LOL  You can watch us create these fabulous jars in our video!
LINK TO VIDEO TUTORIAL:

For this project you will need:

*Glass Gem Accents (Found at the Dollar Store)
*Twine
*Solar Lights
*Scissors
*Jars (Mason Jars work too) 
*Drill bit and drill
*Play Sand
*Summer Embellishments (mine were handmade but you can buy them or you can use sea shells)

Before starting my project I made all the embellishments that I wanted to use in my beach themed jars. You can be creative and make your jars any theme you would like to make them. I like the idea of saving some seashells from a beach vacation and using them in the jars to remember the good times that you had. I used foam sheets and cut them into pieces to make palm trees and umbrellas with beach balls. I did not have any sea shells so I used my polymer clay to make my own sea shells. We thought the beach theme would go great on our porch by the pool. 


I also made a couple of flower jars and one with a dragon fly and butterfly in it. I used green gem accent beads to represent the grass. This gave me another creative theme to put on my back porch. If you use your imagination, you can come up with endless ideas. 

The next thing that I do is unscrew the top part of my lights.

Then my husband drilled small holes in the center of the lids and helped me by attaching the light with the Amazing Goop on the top of the lid. Pick the size of the drill bit that will allow your light to fit inside of the lid.

We put the adhesive around the bottom of our solar light and then pressed the solar light on the lid. 

My husband also helped me spread the Amazing Goop on the lids while I put the twine on them to give it a decorative look.

I wrap my twine in rows around the lid like this and then pushed the twine into the adhesive with a pair of scissors. You can use your fingers too, but I think it is less messy to use the scissors. hehe When the whole lid is covered with twine I cut the twine and push the end into the adhesive to make sure that the end won't come loose.

Next I get my jar and fill the bottom part with play sand to give it that beach look and to weigh down the jar so it won't blow over easily.

Then I add a small amount of accent gems on top of the sand and then put my embellishments into the jar where I want them. You want to give yourself room to wiggle the embellishment where you want them and the small amount of accent gems will help hold it into place until you have all your embellishments placed. Then you add the rest of your accent gems and screw the lid on.

This is what my jar looked like when I was done. :)

  We hope this tutorial will inspire you to give this really cool craft a try. Please take time to visit our YouTube channel. Thank you so much for visiting our blog. :) 

Subscribe to our Youtube channel and join us on our facebook page. We would love to have you join us.
Have a beautiful day!!