

This is an inexpensive craft that is a ton of fun to do. The kids will love making this project. I sure did!! When I decided to do this project, I wanted to come up with something that was easy for the kids to make for a Valentine's Day craft project. This was PERFECT! I really enjoyed myself while I was making my two paintings. It was relaxing and very creative. :)
I will show you step by step how to do this project in this video that I made. http://youtu.be/0mc118Iuij4
What you will need:
* Tacky Glue
* Canvas
* Acrylic Paint
* Paint Brushes
* Paper Towels
The instructions that I came across for this project called for Elmer's glue. Here is a tip: do not use Elmer's glue for this project unless you find a way to thicken the glue. Maybe cornstarch can thicken Elmer's glue. I never tried it but I know it thickens homemade glue. Anyway, I tried to use the Elmer's glue on my canvas twice and it seemed like it would work when I first squeeze it into my designs. But as it sat to dry, it lost its form and dried flat. On my third try I used Tacky glue and it worked perfectly. I just want to save you some time by giving you this pointer. One day I will try thickening my Elmer's glue to see if it will work. It sounds like a great experiment.
 The first thing that I did was get my glue and start making designs. I have seen quotes done with this technique and it is beautiful too. I wanted to stick with the Valentine's Day theme because this is my Valentine's Day project. :) One of the wonderful things about this is that if you make a mistake or you make a design that you do not like, you can wipe it off with a paper towel and fix it. It is fun and care free. Use your imagination and try not to stress about it.
 I let the glue dry overnight before I painted the base coat. Make sure you put a paper bag or a newspaper under your picture while you paint so you do not get paint on your table. I picked a paint color that was neutral to use as my base coat. Try to paint in all the areas around each glue designs so you do not have white spots on your painting. I gave my picture two coats of paint.
 After my base coats of paint were dry, I painted on, and inside of my glue designs to make them stand out. It was a lot of fun deciding where I wanted to add color.
 On the other painting that I did, I painted a light boarder on the edges of the canvas with my fan brush. I wanted to make the picture stand out against my wall because my wall is similar to the base coat of this painting. I like this painting because the colors match my bedroom perfectly. :)
 I really like this painting because the dandelion is holding seeds of love that spread as the wind blows them. hehe It made me smile to do this picture.
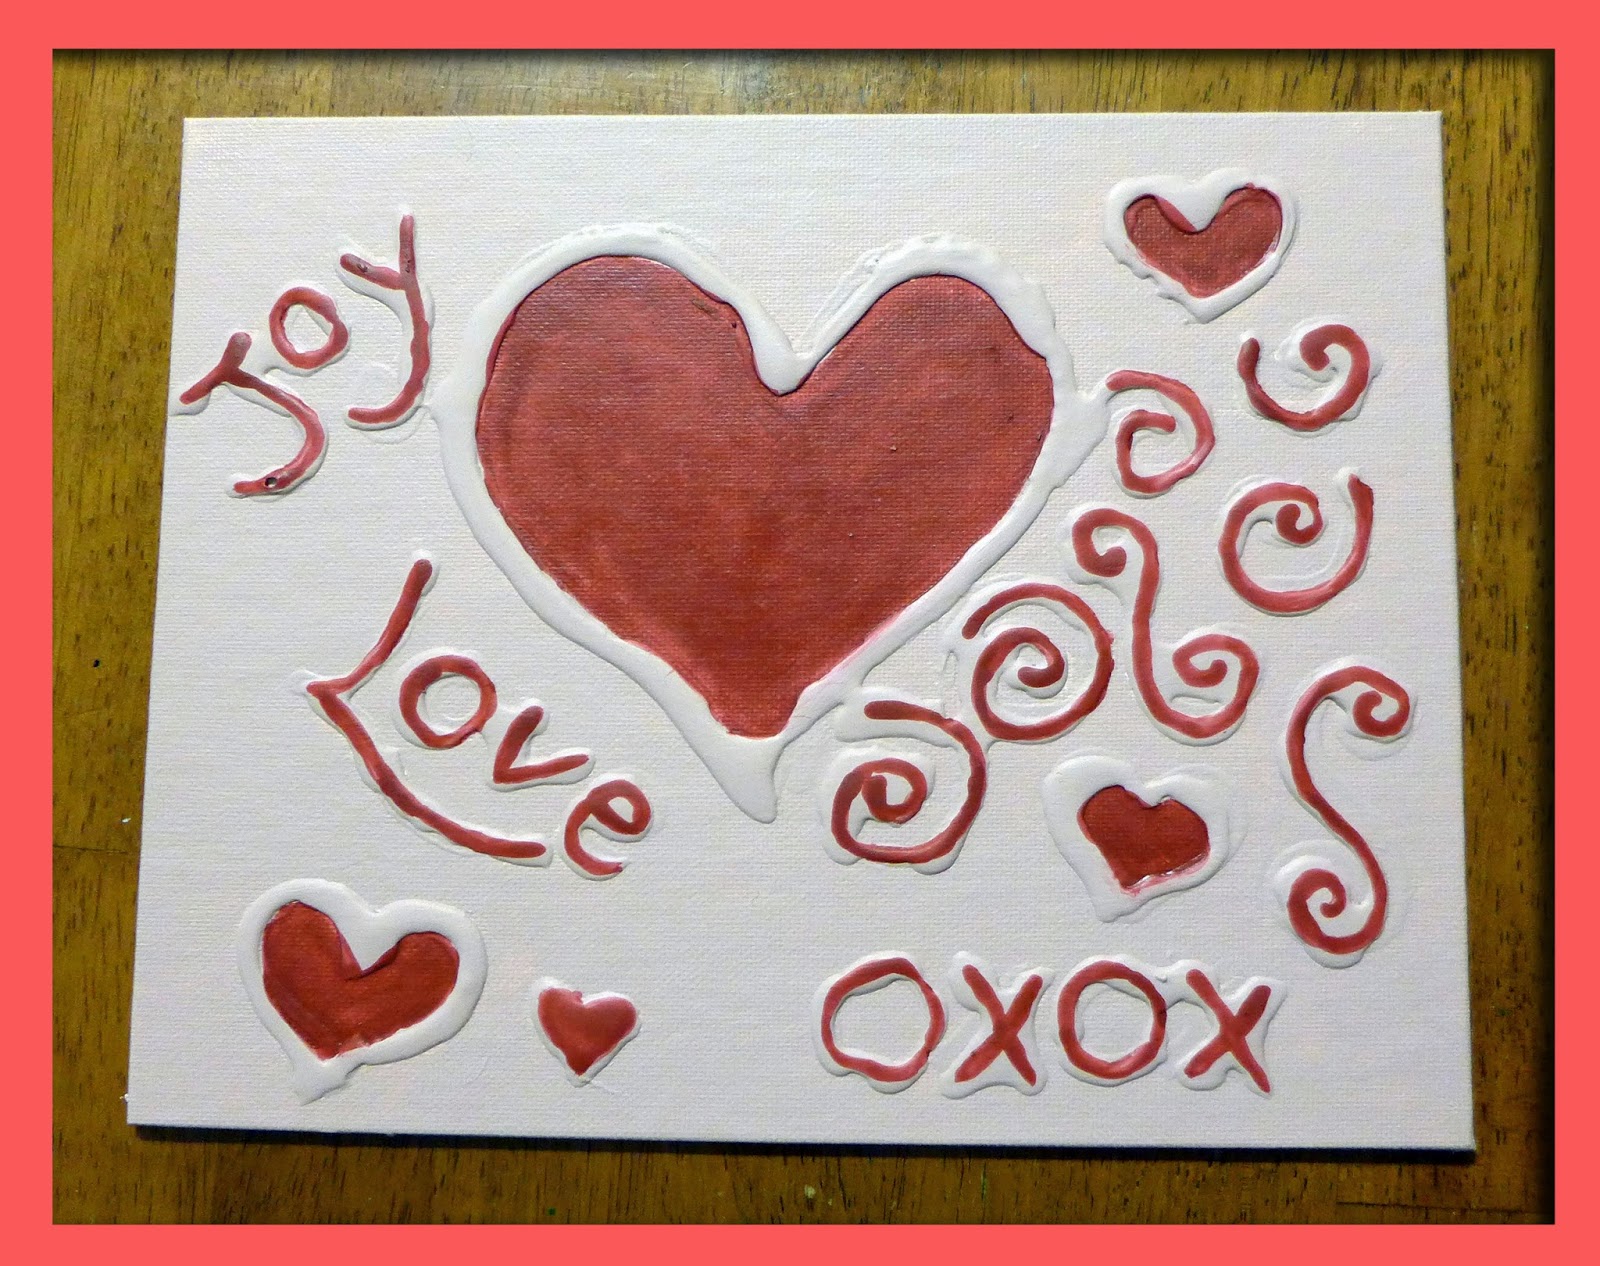 Here is how my heart picture turned out. My boys liked this picture the best because it was bold and colorful. :)
 The texture that the glue gave the paintings added a special touch to them. It made them original and they were so much fun to make. I was actually surprised at how much I enjoyed doing this project. My glue turned out bumpier than yours will turn out if you use Tacky glue because I had to redo my glue a couple of times. But I am very pleased with how they turned out. It was a lovely project that I would love to do again.
Thank you so much for visiting.
Don't forget to check out the video tutorial:
http://youtu.be/0mc118Iuij4
Links to more of our craft ideas:
I will show you step by step how to do this project in this video that I made. http://youtu.be/0mc118Iuij4
What you will need:
* Tacky Glue
* Canvas
* Acrylic Paint
* Paint Brushes
* Paper Towels
The instructions that I came across for this project called for Elmer's glue. Here is a tip: do not use Elmer's glue for this project unless you find a way to thicken the glue. Maybe cornstarch can thicken Elmer's glue. I never tried it but I know it thickens homemade glue. Anyway, I tried to use the Elmer's glue on my canvas twice and it seemed like it would work when I first squeeze it into my designs. But as it sat to dry, it lost its form and dried flat. On my third try I used Tacky glue and it worked perfectly. I just want to save you some time by giving you this pointer. One day I will try thickening my Elmer's glue to see if it will work. It sounds like a great experiment.
Thank you so much for visiting.
Don't forget to check out the video tutorial:
http://youtu.be/0mc118Iuij4
Links to more of our craft ideas:
EASYMEWORLD FACEBOOK:
https://www.facebook.com/EasyMeWorld
EASYMEWORLD YOUTUBE CHANNEL:
https://www.youtube.com/user/EasyMeWorld
KYMBERLY'S
CHANNEL: http://www.youtube.com/user/Marseebros365

.jpg)
.jpg)
.jpg)
.jpg)
+copy.jpg)
.jpg)
.jpg)
.jpg)
.jpg)
.jpg)
.jpg)
.jpg)
.jpg)


