This adorable hot chocolate mug was made on my 12 peg loom. I love coming up with unique loom patterns and this one is a favorite of mine. It even has marshmallows! haha I wanted to share with you how I made my mug of hot chocolate so you can make one too. That is why I made a step by step video on how to do it. I try to make my videos easy to follow so that beginners can do my projects too. I hope that you give this awesome project a try. They are such fun to make. They are also easy to change into your own colors and you can even decorate them in different ways. Use your imagination to create your mug the way you want it.
Click here to see the step by step video tutorial:
Here are 3 easy ornaments that you can make with your whole family. They will also make great Christmas project ideas for teachers to make with the kids. I always loved making easy projects like this with the kids. :) They are inexpensive and quick to make.
Make a snowflake Christmas ornament!
Make an icicle Christmas ornament!
Make peppermint Christmas Ornaments!
This easy step by step tutorial will show you how to make each one of these ornaments. Sit back and enjoy. :)
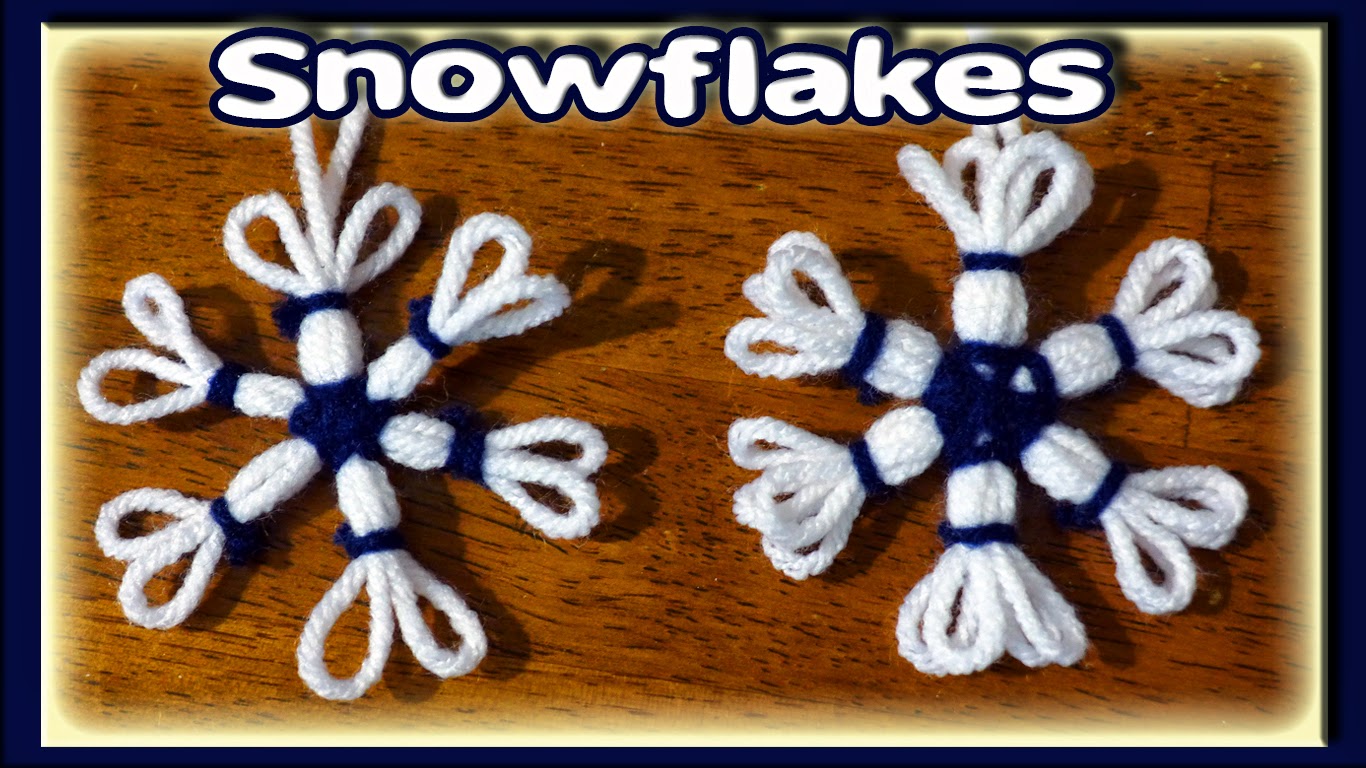
Learn how to make awesome snowflakes on a knitting loom. They are easy to make and you can make them in just a few minutes. These snowflakes will make the perfect winter craft to hang around your house or you can use them as Christmas ornaments to hang on your tree. The kids will love making these adorable snowflakes. Learn how to make these amazing decorations by watching this easy to follow tutorial.
These little Christmas ornaments are so much fun to make and they are so EASY. They will make great gifts to give with Christmas cards. Your friends and family will love them. I made up a bunch of them to give to the teachers at my boys school. This will make a great Christmas craft for the kids too. Yes, it is that easy. :) I hope you give this project a try.
Use your milk jug lid to measure the outside of your wreaths by tracing around the lid like this.
Now place the dime in the center of your wreath and trace around the dime.
Once you get several wreaths traced out, cut along the lines. I cut from the outside of the wreath to the traced line in the middle to make it easier to cut the center circle out. This will also make it easier for young kids to cut the center circle.
Get a piece of clear tape and tape where you cut from the outside to the inside circle. The tape will be covered with yarn so do not worry about it showing.
Measure your yarn by wrapping the yarn around a CD case several times. Then cut the yarn along the edges of the case.
This will make enough yarn pieces to make several wreaths.
Now fold a piece of your cut yarn and put the folded end through the center hole.
Take the two ends of your folded string and pull it over the top of the cardboard like this.
Then put the two end strings through the folded end of your string and pull the string tight. Push all your strings close together as you do each one.
When you are done and the cardboard piece is covered with yarn, place a piece of paper under my wreath and evenly cut all the edges to make them even. (The paper makes cleanup easy)
Cut a long piece of yarn and loop it onto the cardboard to give it a string to hang the ornament. Tie a couple of knots at the length that you would like the ornament to hang. Cut off the extra yarn.
Tie a bow with the red yarn and hot glue the bow onto the bottom of the wreath like this.
Now you have a cool ornament to hang on your tree or to give as a gift.
You can leave your ornament plain or you can decorate it with beads or puffy paint. I love puffy paint so I decorated almost all of mine with puffy paint. :) Use your imagination to decorate your ornaments however you want them.
Here are a couple of the ornaments that my niece and I did together. We had such fun making them and it made great memories.
I really enjoyed coming up with this Christmas ornament idea. I had such a great time making our Winter Hat Christmas ornaments a couple of years ago that I wanted to make an ornament that was similar but different. If you haven't seen that tutorial... Check it out! :)
These Themed light jars may look expensive but they are actually cheap and easy to make. It only took me 10 minutes to make each jar. They will make great gifts too. The theme ideas are endless. I made 3 jars: 2 fall jars and 1 Christmas jar. You can make your jar for any holiday, season, football team, color or even Disney movie theme. Use your imagination to create your own ideas. These light jars look amazing sitting on any table or counter. Your friends and family will think you spent a lot of money for your awesome light jar when they see it.
Here is our step by step video tutorial if you want to see how I made my jars. I also give LOTS of extra tips in the video to even make your jars more unique.
*Garland, potpourri or whatever you want to use for your theme.
*Material or Felt for the top
*Clear tape
*Scissors
*Ribbon
I will show you how I made my Autumn Potpourri Light Jar.
I used pumpkin spice potpourri to theme up this light jar.
Put a little bit of potpourri in the bottom of your jar. Then start mixing the lights with the potpourri. I used a spoon to make it easy to arrange the lights where I wanted them.
As you are filling your jar, be aware of which side of the jar will be the back of your jar. That way you will be sure to have the best stuff up front where people will see it the most.
Once the jar is arranged the way you like it, I put put the light plug through the mason jar band and then screwed it on the top. If you are not using a mason jar than you do not have to worry about this part. I use my clear tap to hold the lights in place on the inside lip of the jar and on the outside back of the jar.
I used the lid to cut my material to the size of the top of my jar.
Then I hot glued the material onto the top. I used ribbon that matched the color of my theme and tied a bow. Then I cut and glued another piece of ribbon around the lid. The last thing I did was to glue the bow on the top of the jar. Make sure it is centered to the front of the jar. This is what it looks like on the top when it is finished.
Here is my Christmas Themed Light Jar.
I used a Christmas garland with white lights for the inside of this jar. I also used a smaller jar and my ribbon was a bit wider.
Here is my Leaf Themed Jar.
I used garland to mix with orange lights for this jar. I found my garland at the Dollar Store for $1.00.
I hope this tutorial encourages you to give this craft a try. Thank you so much for visiting our blog. Don't forget to check out the video tutorial.
This is a great way to use up your scrap yarn and make Christmas decorations at the same time. These cute little snowmen are such fun to make. They will make great gifts or package decorations also.
In this tutorial I will be showing you step by step how to make these adorable snowmen on a 12 peg knitting loom and then how to put them together. Even beginners can do this project. They are sure to bring a smile to all who see them.
So check out our step by step tutorial on how to make these amazing snowmen.
I hope this tutorial inspires you to make a snowman of your own. There is no better way to use up your scrap yarn than to make Christmas ornaments, gifts and to bring a smile to your friends and family.
Thank you so much for visiting our blog site and watching our tutorial.
This is a free loom pattern for all who enjoy looming. Knitting on my loom is such a fun thing to do and I love to come up with new patterns. This is a very colorful and decorative autumn craft. The kids will love doing this craft. The step by step instructions are easy to follow along with. It is easy enough for beginners to do. Even though I made my pumpkins small, you can also make them large by using a larger loom and adding rows to the pattern that I share with you. You can make your pumpkins plain or you can make your pumpkin into a Jack-O-Lantern. They make a wonderful Halloween craft project. I know you will have a blast making these adorable little pumpkins, so give them a try. :)
Follow along with this EASY step by step video tutorial:
These feather pens are easy and fun to make. They will make great gifts and you can be super creative with them. I made 7 different pen styles to give you examples to go buy in order to get you started so that you can come up with your own ideas.
I will be giving my feather pens as gifts with a blank journal to encourage friends and family to write. I know they will cherish this beautifully handmade gift. Give this wonderful craft a try. You will be amazed at all the ideas that you can come up with.
In this blog I will explain to you the basic way to make a feather pen but if you want more detail on how to do these beautiful pens, check out our video tutorial:
The video will show each of my 7 feather pens in detail. I will explain to you which gemstones I used for each pen and I will show you the designs that I painted on them. They are pretty amazing and I had a hard time picking a favorite. :)
~~~~~~~~~~
LETS GET STARTED
The first thing that you will need is feathers. You can use store bought feathers but I used mostly goose feathers that I found and collected. I carefully chose the 7 feathers that I wanted to use for this project out of my collection.
Then I used dish soap in warm water to wash my feathers by swishing them in the water gently. Then I rinsed them off and set them on a paper towel to dry. You may have to carefully straiten your feathers so that they dry nice and smooth.
After the feathers are dry, I used acrylic paint to paint designs on them. They were a joy to paint... And so easy. Simply use the paint brushes that you have on hand to paint your feathers. You do not need to buy special brushes. :)
I used Bic pens to make my feathers into pens. They are easy to get apart and I had an extra pack of them in my office to use for this project.
Some feathers have large quills and some have small quills. You can use both sizes to make your feather pen. Don't worry, you wont be able to see the quill when we are done. We will be decorating it. :)
If you have a small quill on your feather than you will need to use the whole pen. You will need to remove the end cap on the pen first. Simply take the ink cartridge out of the pen and then use something that is long and thin to push the cap off of the end of the pen through the center of the pen shell. I used a BBQ skewer to push the cap off of mine. It worked perfectly.
After the cap is removed, you can put the quill of your feather into the top of the pen like this.
I used E6000 adhesive to decorate the outside of the pen by glueing hemp string, twine or crochet string to the outside of the pen.
I simply wrapped the string down the whole length of the pen. It not only decorates the pen to give it style but it gives it a wonderful grip to make writing with the pen nice.
If the quill on your feather is large, you can easily cut the very tip of the feather off and insert the pen into the center of the quill.
If your ink cartridge is a bit too long to fit inside of the quill, simply cut it to the length that you need it.
The ink cartridge fits perfectly!
Now all you need to do is use beads, feathers or any kind of embellishment to make your feather unique. The possibilities are endless and the styles of your feathers can be so different. Use your imagination to make each one different.
I used wood beads, gemstones and feathers to make this pen stylish. I used a Blue Heron feather for this pen.
I simply painted tree branches and feathers on this pen and used leaf embellishments and jasper beads to make this pen look like nature.
I used turquoise and amethyst beads to enhance this pen. I also painted designs on it to make it unique. On the back of this pen I used paw print designs.
Because I like autumn so much I made a Harvest Moon Pen. Fun stuff!!
Get a better view of each of my pens in the video tutorial.